How to get started with Davinci Resolve 18 – Full beginner’s tutorial
Davinci Resolve 17 is a powerful (and free) video editing software, that can really come in handy for medical illustrators and scientific illustrators when it comes to editing videos for social media (such as reels, IGTV, facebook video, Youtube videos, etc), patching together 2D animation and much more. It’s available for Windows, Mac and Linux.
If you’ve ever used another video editor such as Sony Vegas, Premiere Pro, Final Cut or even the old Windows Movie Maker, you’ll feel at home in Davinci Resolve’s interface. It’s the same basic principle: you work on a project, you import clips (audio, video, pictures) into a timeline, make cuts and then render it into a final video.
Disclaimer: I’m not sponsored or affiliated to BlackMagic (the creators of Davinci Resolve) I just like the software.
Start a new project
When you launch Davinci Resolve, the first thing you’ll see is the Project Manager page, it shows all your existing projects within a database. Hit New project at the bottom to start a project from scratch.
By default, these are collected inside a single database called Local Database, but you can create a new one (and we encourage you do so ASAP). The options are: New Database at the bottom to create a new one or Connect to link an existing database. I prefer to have my Artomedics database on a separate SSD drive on my computer, for smoother operation.
You can even have folders within a database, if you want to better organize your projects.
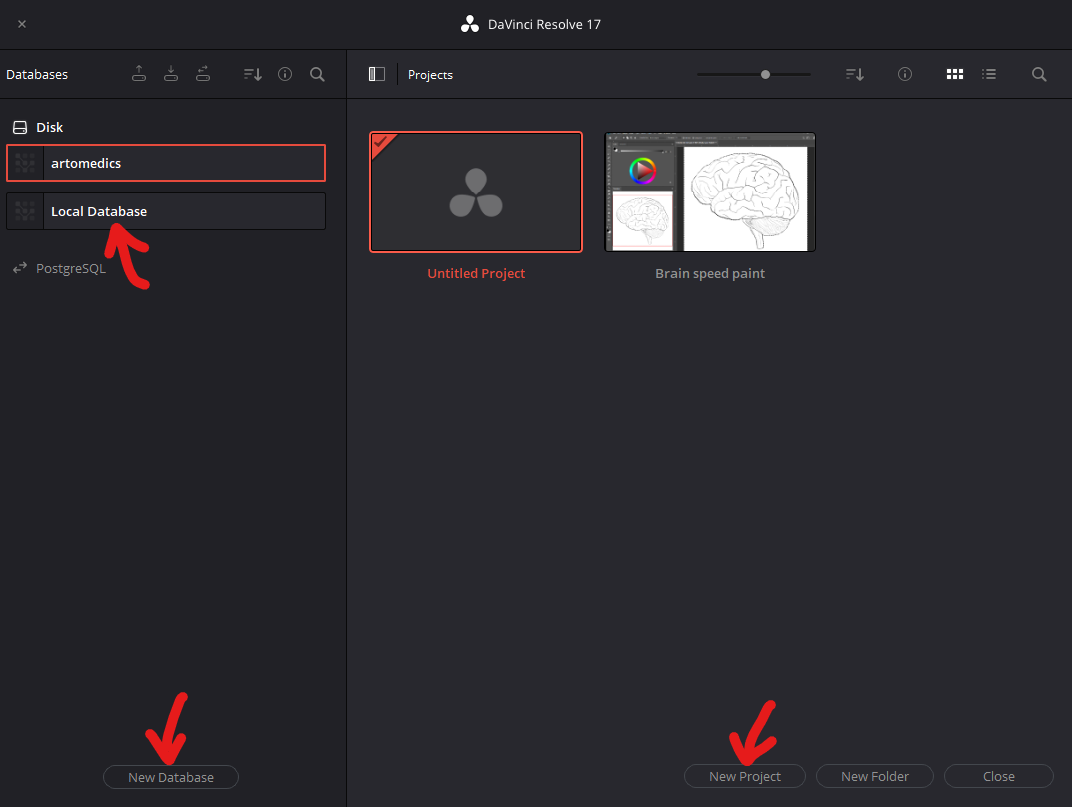
Davinci Resolve 17 Workspace
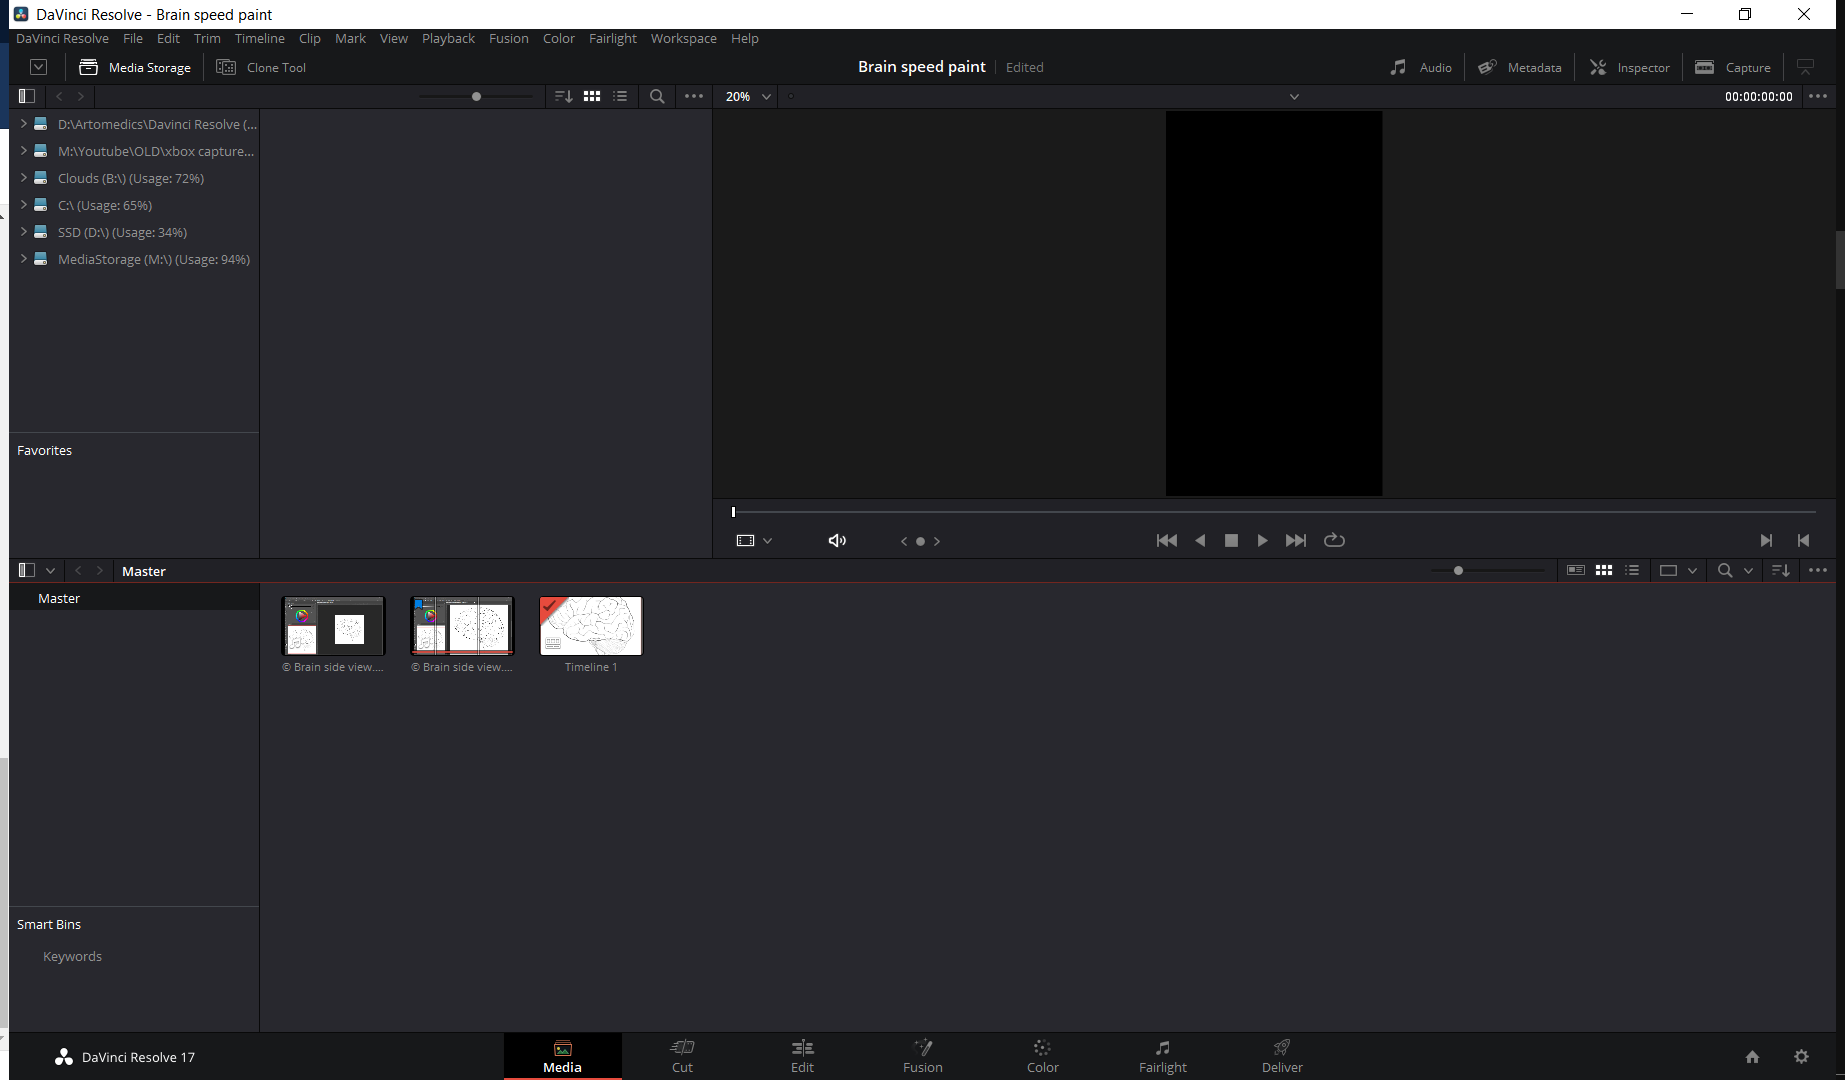
The main interface is divided in 7 workspaces at the bottom: Media, Cut, Edit, Fusion, Color, Fairlight and Deliver.

Each of these tabs are in sequential order but you don’t necessarily have to work through them in that order.
- You start at Media and import all the necessary clips for your project.
- Cut is for trimming media and mounting clips into a timeline.
- Edit is where you mix and match different clips, video and audio in a traditional timeline format.
- Fusion is for adding visual effects in the form of nodes.
- Color is a dedicated workspace for fine-tuning the color.
- Fairlight is a dedicated workspace for audio adjustments.
- Deliver is where you render and save your final video.
You don’t need to use all the tabs, and in this beginner tutorial, we’ll start at Media, move to Edit and then render at Deliver.
Importing Media into Davinci Resolve 17
You can drag and drop your clips into the media master bin.
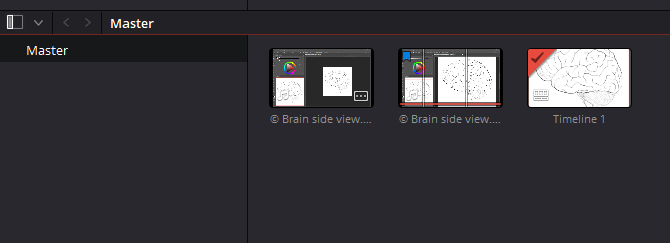
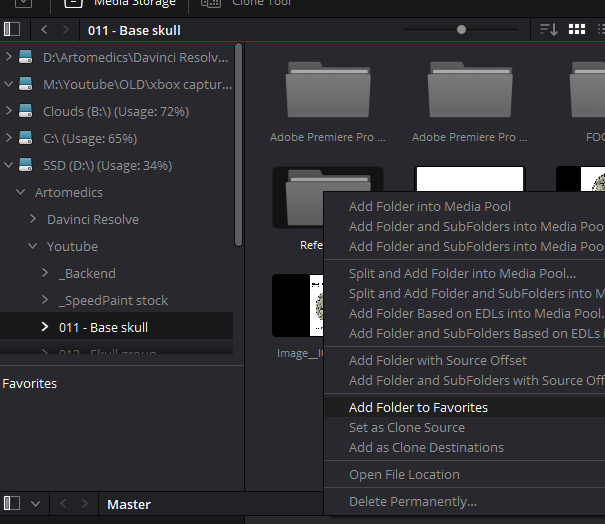
Or you can browse in different disks and locations on the left sidebar.
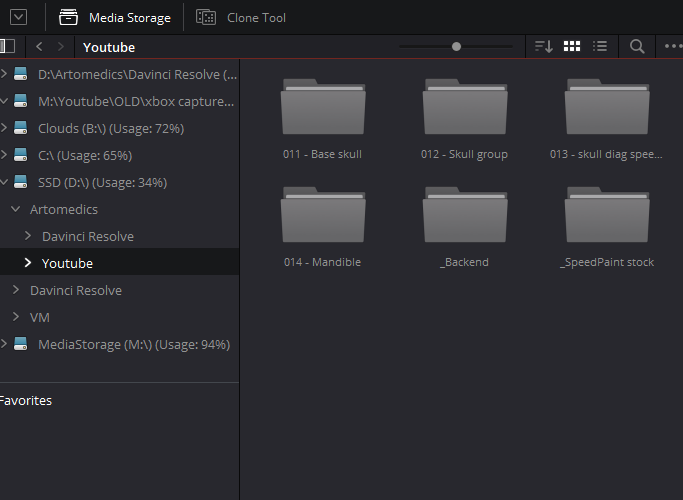
Clicking on one will reveal the folders on the right pane, which you can further explore and drag the clips to the media pool on the bottom.
You can add a location as favorite for easy access whenever you’re working.
You can quickly preview video clips by hovering the mouse over them, it will show a line, you can hover left to right on the video thumbnail to preview any point of the video, on the left to right.
Timeline, Clips and Preview
To start building your video, go to the Edit workspace,
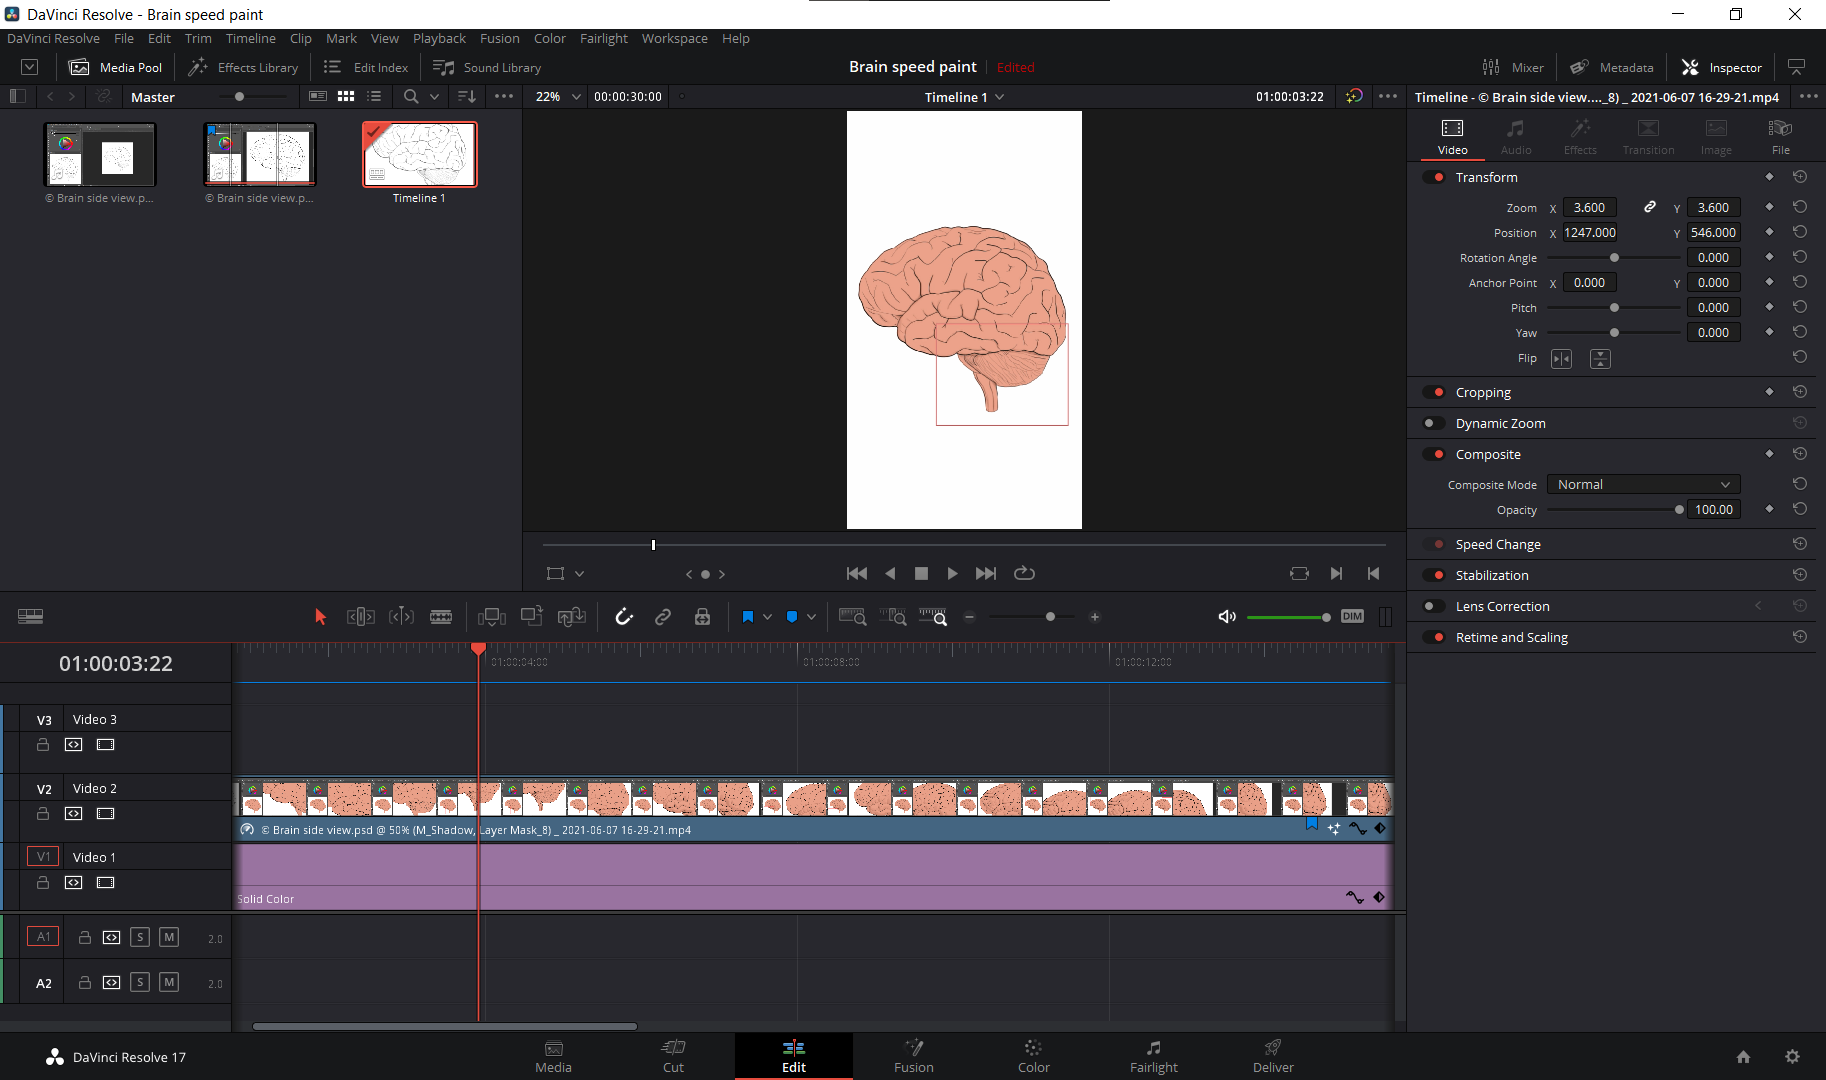
Drag clips from your media pool on the top left into the timeline. It may ask you if you want to change your project setting to match your clip.
The media is shown as small blocks called clips with their file name and extended as much as they last in time.
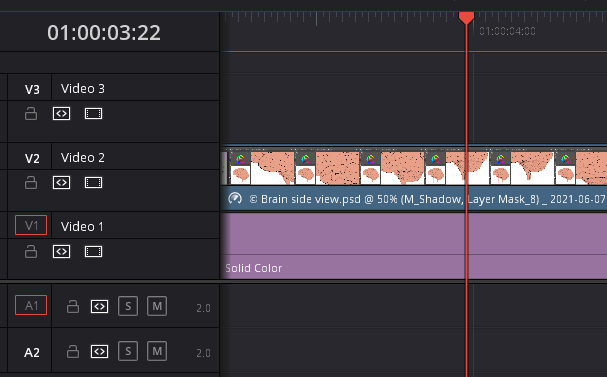
Video clips and pictures in blue color are contained inside Video Tracks, with a V and a number (as many video tracks you have). Music and audio files are green and kept separated from visual content inside Audio Tracks at the bottom.
It’s good practice to save often. You can use the CMD+S/CTRL+S on Windows, define the project name the first time you save.
Global shortcuts
Davinci Resolve is designed in a way that if you come from other popular video editing software (ahem like Premiere pro) you’ll get around pretty easy, with many shortcuts being almost the same.
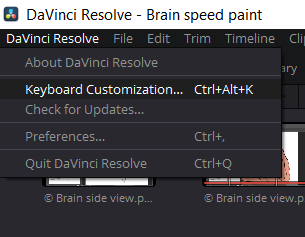
You can explore and get familiar with the shortcuts or change them to match Premiere Pro.
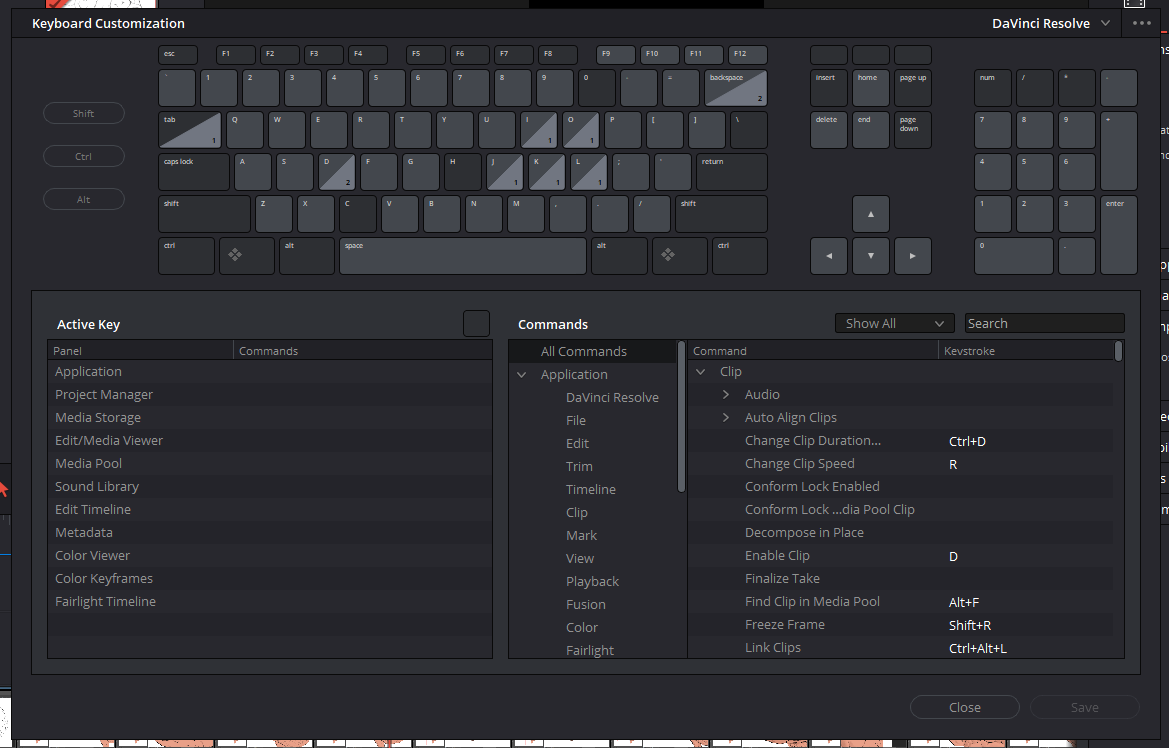
The presets available are on the top right corner of this window, you can choose between DaVinci Resolve, Adobe Premiere Pro, Final Cut Pro X, Avid Media Composer and Pro Tools. I personally prefer to use and learn DaVinci Resolve’s own shortcuts, but even the defaults are pretty similar to other video editing software.
Other global shortcuts that you may have used in other programs that work here are:
| Undo | CTRL + Z |
| Redo | CTRL + SHIFT + Z |
| Select All clips | CTRL + A (on timeline or media pool) |
| Play/Stop | Spacebar |
| Delete Selected Clip on timeline | Backspace |
You can zoom in or out of the timeline, around the red marker (playhead), using the mouse wheel or the zoom controls just above the timeline time strip.
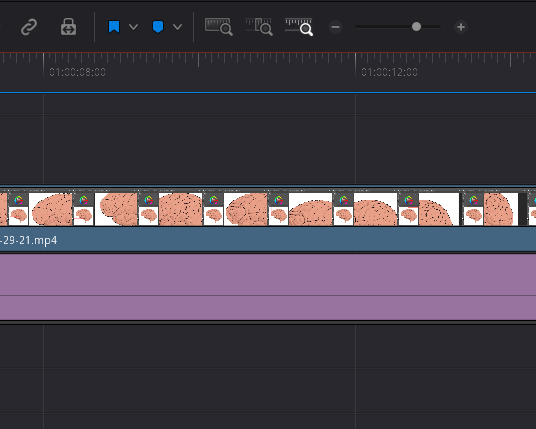
You can move forward and back in the Timeline by moving the mouse wheel to the sides (if your mouse allows).
| Zoom in and out timeline | ALT+Mouse wheel |
| Move forward or backwards in timeline | CTRL+Mouse wheel |
| Zoom in or out the Video or Audio tracks (where your mouse is at) | SHIFT+mouse wheel |
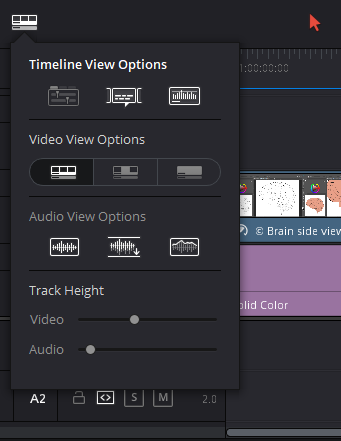
You can fiddle around the Timeline View Options to get a quick preview on the clip content by showing and extending video frames and audio waveforms on these.
Editing in Davinci Resolve 17
Track Options
Video Tracks work as layers in Photoshop or Clip Studio Paint: the top most tracks are shown first in terms of visibility.
Use the Track options on the left to manage their content as you need. Use the Lock to avoid any track being modified (much like layer lock).
You can Show or Hide content on a Video Track using Enable/disable video track. Disabled tracks are shown in Gray.
You can also disable a particular clip, when selected, pressing D.
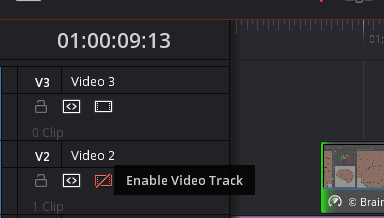
For Audio Tracks is the same but slightly different. Using the M mutes that track but using S (solo) Mutes all other tracks but this one.

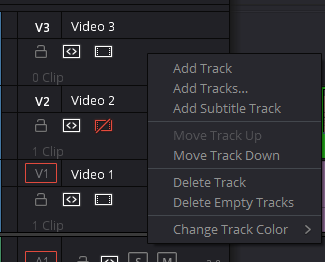
There are other options in tracks. Right-click on a track to Delete, change color and even delete empty tracks. You can also name each track by double-clicking on the name (Video 1, Video 2 etc) and typing the new name.
Selection Mode
You can use the mouse or selection mode, pressing A. The Arrow will turn red. Basically this mode allows you to drag and drop any clip in place, within the same track or in another one. If the track doesn’t exist yet, it will create it for you.

Be careful not to overlap clips in time within the same Track or one of these gets cut.
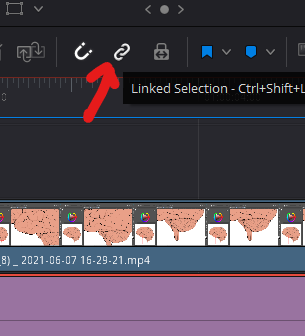
Clips that have video and audio, move together when dragged, showing a link chain. This is great cause you don’t want to be moving the video and leaving the audio behind unsynced. But in case you do want to edit each independently, you can hit CTRL+SHIFT+L or use the Linked selection option. When marked, linked clips will move together, when off, clips will move independently as you drag them (audio or video) in their respective tracks.
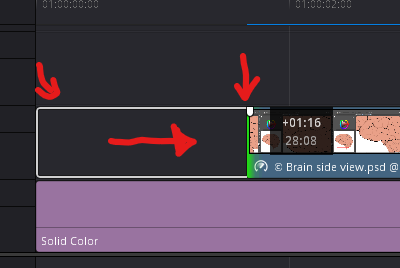
You can trim a clip by grabbing the start or the end of it. Likewise, you can stretch a clip in the same manner.
You can copy a clip by Drag + hold ALT and delete clips using Backspace.
Press B to use the Blade Mode, just like in Premiere Pro, were you press V. You can also split a clip right at the playhead pressing CTRL+B.
Clip Speed
If you wish to shorten or extend a clip without losing any content, Davinci Resolve let’s you change the speed rate at which they play (speed up a clip) When you right-click on a clip and go to Change Clips Speed.
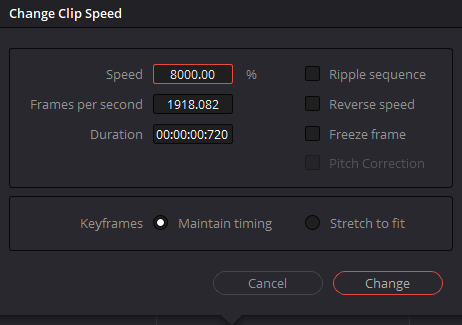
| Speed up | Set speed above 100% |
| Slow down | Set speed below 100% |
Editing clips in the Inspector
Selected clips on the timeline can be further edited using the Inspector.
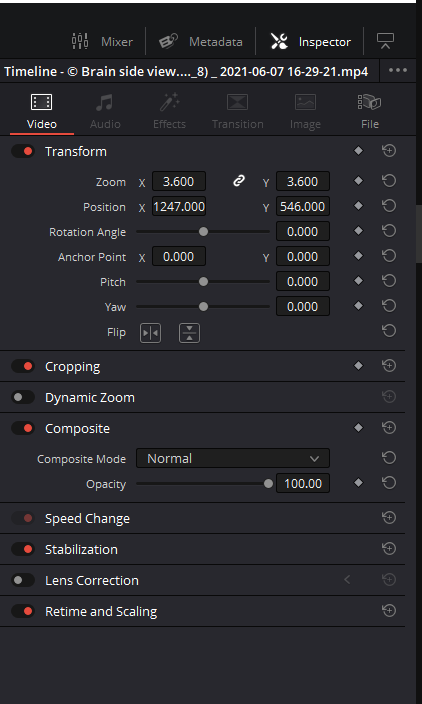
You can modify a clip’s properties from here, each sorted in tabs: Video, Audio, Effects, Transition, Image and File.
You can modify the values by dragging the arrows to left or right on top the value (just like in Premiere Pro or Photoshop) or use the provided sliders. The changes are reflected instantly in the Preview.
An option is enabled when the slider is red. You can turn on or off any of these modification by checking off the red sliders on each option.
Video Tab
| Transform | Zoom, move position, Rotate and Flip the clip |
| Cropping | Cutting parts of the video in each direction |
| Dynamic Zoom | Easy-to-setup zoom effect (for advanced, you may need keyframming) |
| Composite | The way the clip blends in relation to others (like layer modes in Photoshop) You probably don’t need this for now. |
| Speed Change | Shows the speed of the clip and direction (you can reverse or freeze the clip also) |
| Stabilization | Stabilize shaky camera shots, hit “Stabilize” and fiddle with the modes if needed. |
| Lens Correction | Attempts to correct the lens distortion analyzing the video. |
| Retime and Scaling | Settings for retime and scaling (leave as project settings) |
Audio Tab
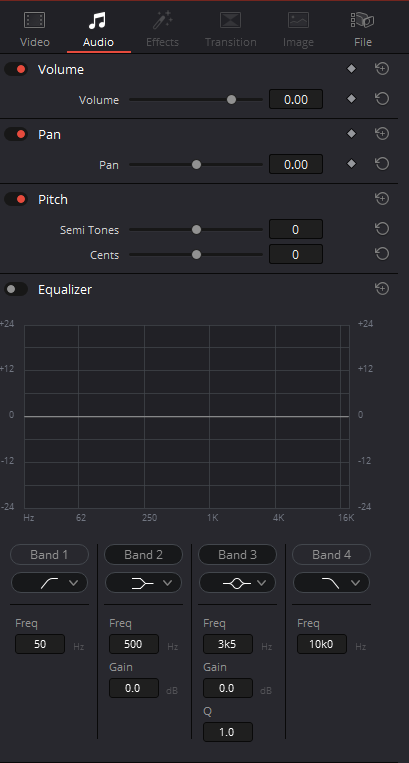
Most likely you’ll only need this tab to adjust volume here and there for now. The rest of the options you can let them be.
| Volume | Change the volume of the audio in the clip |
| Pan | Set the stereo audio balance right or left |
| Pitch | Make the audio high pitched or low pitched |
| Equalizer | Change advanced settings in the audio |
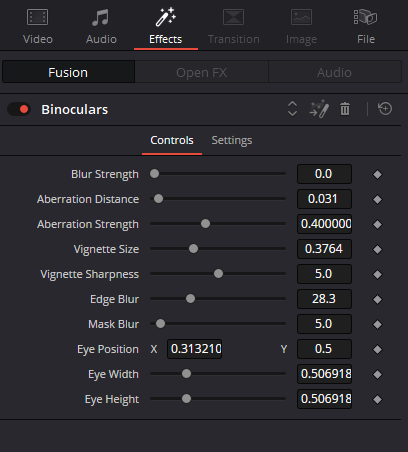
Effects and transitions tabs are available when Effects and Transitions are applied to the selected clip. Then you’ll see different options to fine tune the effect or transition applied to this clip, and you can turn off a particular effect or transition without deleting it, using the red toggle.
To fine tune Effects and Transitions, you might want to fiddle around with Keyframes and Envelopes.
File tab
Here you can see information about the selected clip like it’s resolution, frame rate and video/audio codec. You can change the Metadata and Clip color if you want, just like you can change layer colors and names on Photoshop.
There’s also a dedicated Metadata tab right next to the Inspector, which pops out bottom right.
How to use Envelopes and Keyframes on clips
When you modify and correct a clip, a waveform icon appears on the clip. If you click on it, an envelop appears. If you’ve used Sony Vegas & Premiere pro, you’re probably familiar with this. This is akin to Correction layers in Photoshop or Clip Studio Paint.
When you apply corrections like Dynamic Zoom or Retime/speed up, you get a waveform icon.

You can control the envelope of this effect here live and visually. The dot on the wave is a keyframe. It marks a spot in time where the effect starts or ends (or changes course). You can add a new keyframe hitting the rombus icon below the waveform. If you place the red marker in time and click the rhombus button, you create a keyframe, saving the current value in the instant of time it is on. So, placing two or more keyframes in the timeline, saves different values, and creates an envelope curve that changes the property across time.
You can choose which envelope to see by clicking on the dropdown menu on the left next to distortion. This list shows all the available envelopes to show.
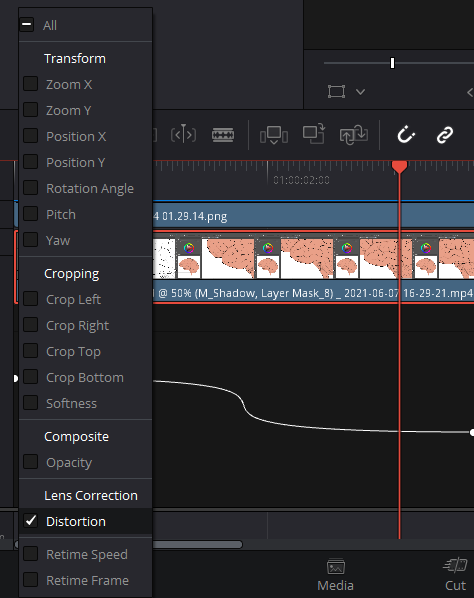
- Remove a keyframe pressing CMD+X (or CTRL+X on Windows).
- Drag drag each keyframe horizontally to move it in time
- Drag a keyframe vertically to change the value it saves.
- Select any keyframe and use use the options above to shape the curve.
- Return to a static property you can use the Revert button on the Inspector panel to delete all the keyframes on the curve.
Exploring the Effects Library
Effects Library on the left (next to Media Pool) houses Transitions, Video/Audio Effects and Titles templates to use in Davinci Resolve projects.
To add a Video or Audio Transition
Effects library limitations in the free version
You might encounter this message when using Effects that are not included in the free version, but that’s fine. Most of your basic editing doesn’t need fancy FXs. Or if you really come to love Davinci Resolve, you can purchase their Studio version for $299 USD one-time payment.
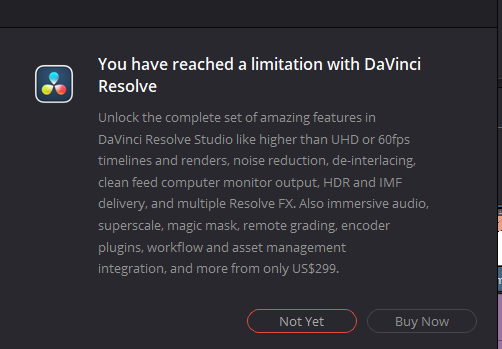
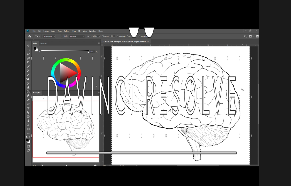
You can preview FXs by hovering the mouse left to right over the name of the FXs. If it says “Davinci” on the Preview, then it’s only available on the paid version. This applies to all the Effects in the Effects Library.
Applying a Transition
- Select Video or Audio Transition from the Toolbox pane on the left in Effects Library.
- Select the desired transition.
- You can hover the mouse left to right for a preview of the video transition
- Drag and drop the Transition into the clip you want to apply it to in the timeline in the edge of the clip.
- You’ll see a cross-fade on the edge of the clip where it was applied.
- Drag the edge of the crossfade to adjust the duration of the transition.
- With the Transition selected, check Inspector>Transition for more fine-tuning.
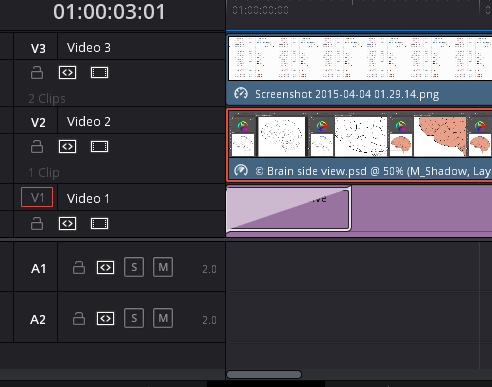
Video Transitions change the opacity of the clip over time, while Audio Transitions change the clip’s volume over time.
- You can replace a transition by dragging and dropping a new one into it.
- You can delete it by selecting it and hitting Backspace.
Other FXs
In the OpenFX and the AudioFX section of Davinci Resolve’s Effect Library, you’ll find Video effects and Audio effects you can drag and drop onto your clips, respectively.
These clips will show an FX icon in the corner. You can turn on or off each effect on any given clip you’ve previously applied it to by checking the Inspector panel, under the Effects tab mentioned earlier. It allows you to make finer adjustments just like any other property in the Inspector.
Some effects let you enable the OpenFX Overlay mode to edit some effect properties directly on the main Preview.
To delete an Effect from a clip, use the trash icon.
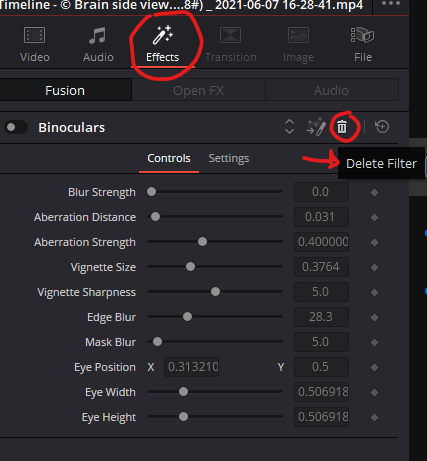
And the arrows up and down to move the FX order up and down.
Adding Titles in Davinci Resolve 17
In the Effects Library tab on the left, you can browse the available Titles presets.
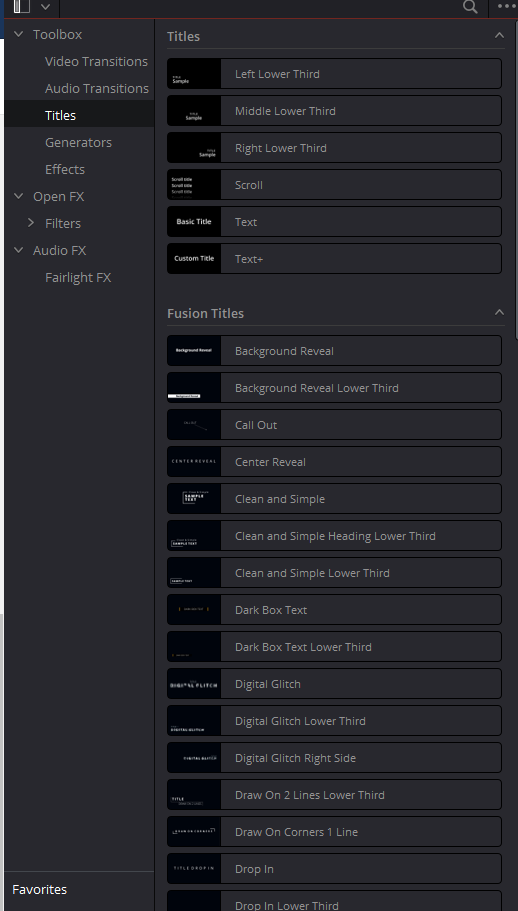
Hover the mouse left to right to see a preview of of the Title. Fusion Titles are animated. The Titles that aren’t available for free will show a “Davinci” overlay.
Drag and drop the desired Title into the timeline.
These clips can be managed like any other clip from the Inspector>Video tab. In the Title section you can choose different versions (if available), input and edit the text to display and other settings, such as color, size, style, distribution, shadow and also background color.
Rendering and exporting your video from Davinci Resolve 17
When you’re done and happy with your edited timeline, it’s time to Render and Export your video.
Head over to the Deliver Workspace.
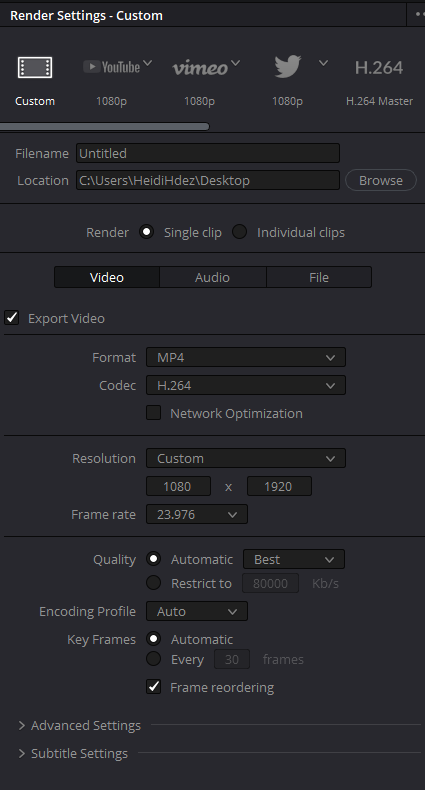
If you’ve used Premiere Pro or Sony Vegas, this is very similar. You can change the settings in Custom or choose one of the available presets. My recommendation is that you go with custom and choose the settings yourself, as the Youtube presets are weird.
- Choose a filename for the video, and where to save it (hit browse).
- Choose “single clip”
- In the Video tab, choose a format and Codec. I recommend MP4 and H.264
- choose the resolution. 1080p is 1920×1080 resolution (widescreen) in reverse if portrait like in IGTV or Reels.
- Leave the framerate at 23.9 or 24.
- Set the quality to Best and leave the rest as is.
- In the Audio tab, mark export audio if you want audio in your video, leave unchecked otherwise.
- Leave codec as AAC (unless you know what you’re doing)
- Everything else in audio is probably fine as is too
- The File tab will show extra info about the filename
- You can choose custom name and file suffix if you’re saving multiple clips
- File subfolder name if you need it and how many digits in the filename for multiple files
- The render speed is probably fine as is, only slow down if you had unsuccessful renders before.
Davinci Resolve will try to give you a rough idea on how much the final render will take. It shows the Disk space you current have used and the dis space that will be used after the render in the selected location.
Now, you can see a preview and a timeline to check. You could choose an in and out range to render, but as a beginner you should probably render the entire timeline.

Hit Add to Render Queue and go to the Render queue on the right side.
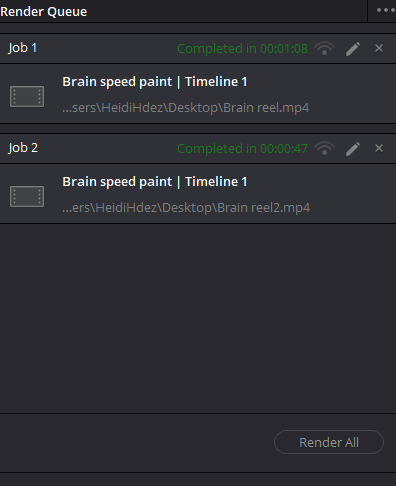
Hit Render All and wait for your render to finish.
Davinci Resolve FAQs
Are Davinci Resolve updates free?
Yes, forever–paid version (studio) or free version. And you can always select Auto Update and opt-out of the beta releases.
What are the system requirements for Davinci Resolve 18?
- At least 16GB of Ram, 32GB recommended if you’ll be using Fusion for Visual FX.
- Windows 10 or above / MacOS big sur or above
- Onboard Graphics video card or separate video card with at least 2GB of video RAM
- Video card must support OpenCL 1.2 or CUDA 11
For more updated information visit Blackmagic’s website.
What are the limitations of Davinci Resolve free?
If you’re doing mostly simple edits and almost no Fusion FX, you’ll be fine. You are limited to 4K UHD and below and no 10-bit footage. The free version doesn’t engage in GPU rendering so expect a little slower rendering times.
There’s also HDR grading, multi-user collaboration (for those team projects), 8-bit video editing and GPU acceleration is available for playback but not for rendering. Most of the VFX are only available in the studio paid version and with good reason because they are really good.
The paid version (studio) allows higher than 4K editing and 120fps.
Do professionals use Davinci Resolve?
Most certainly! You might think that Premiere Pro is more popular because of the Adobe creative suite, but the reality is that Premiere Pro crashes with big and complex projects and that’s quite a hassle, (speaking from personal experience). With Davinci I’ve never had that problem before.
Can Davinci Resolve use and support mp4 format?
Yes. Totally, smoothly you can use MP4 on a project or render to MP4, which is the format that most social media websites prefer.
Can Davinci Resolve use and support mp3 format?
Yes, absolutely.
Can Davinci Resolve Record Screen?
Unfortunately, no. But if you’re on windows, you have a built-in screen recorder you can access with Winkey + G with the Xbox gamebar.
How much RAM do I need for Davinci Resolve?
16GB is the recommended but you’ll probably be fine with 8GB.
Does Davinci Resolve free have a watermark?
No. In general, you won’t see any watermark on your rendered videos, except when you use one the premium VFX or Fusion Titles, then that specific clip will show watermark.
Does Davinci Resolve use GPU?
Yes, the free version uses GPU acceleration for video playback but not for rendering. Now, the Davinci Resolve Studio version (paid) allows both, playback and rendering using the GPU.
Is Davinci Resolve still free?
Yes, absolutely.
Is Davinci Resolve a one-time purchase?
Yes. The paid version is around $295 USD for a life-time one time purchase that comes with two machines license.
Thanks for reading this entire tutorial. If you liked this one, consider signing up for our monthly newsletter to receive more tutorials like this right in your inbox!
[hubspot portal=”9492780″ id=”ec24fdff-5871-43d4-8311-bd2e920f83e4″ type=”form”]
Leave a Reply